
Parts for the pump
| Quantity | Part |
|---|---|
| 4 | M3 nuts |
| 3 | M1.85×10 screw |
| 3 | M3x3 screw |
| 4 | M3x8 screw |
| 4 | M3x11 screw |
| 3 | Bearings 5x13x4mm 695ZZ #1 |
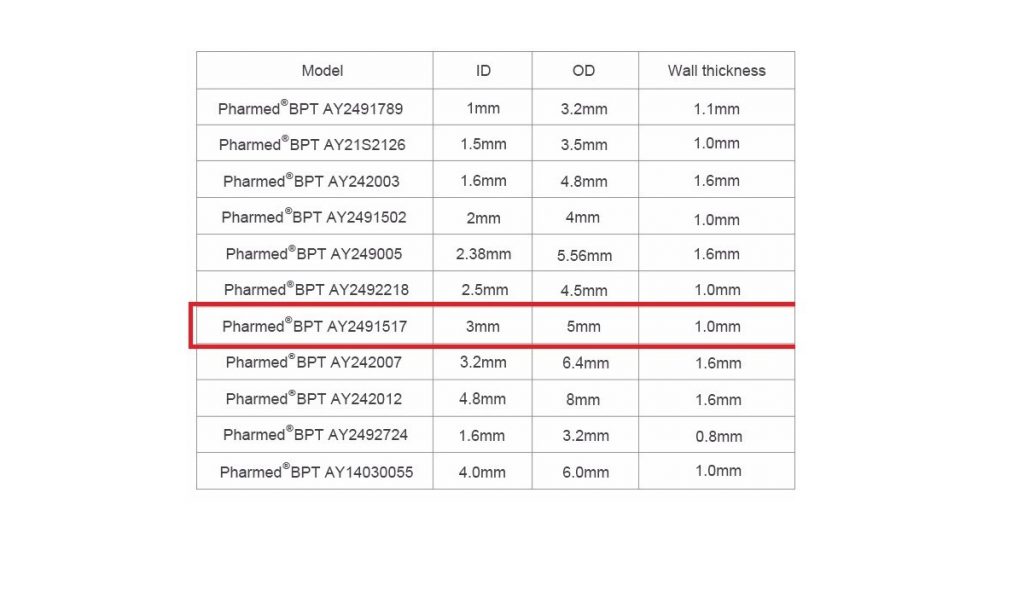
| 1 | Tubing PharMed BPT #2 |
| 1 | Nema Stepper Motor |
#2 information in the picture.
3D printed parts mounting



Parts for the box
| Quantity | Part |
|---|---|
| 1 | ABS Electrical box 240x160x90mm |
| 1 | Cable gland PG 7 |
| 1 | 4Pin Gx12 Male & Female Aviation Connector Plug |
| 13 | M3 screw #1 |
| 13 | M3 spacer |
| 1 | Dual male 40 pin header 2.54 pitch |
| 1 | IEC320 C14 Inlet Power Socket Fuse Switch Connector |
| 1 | Arduino Mega 2560 R3 |
| 1 | TFT LCD screen module Ultra HD 320X480 for MEGA 2560 R3 Board |
| 1 | Connectors cable ATA and IDE interface #2 |
| 8 | Male-female Dupont Cable |
| 1 | LM2596 DC-DC Adjustable buck converter Step-Down #3 |
| 1 | PCB Printed Circuit Board 5x7cm |
| 5 | Tactile Switches #4 |
| 1 | 12-24V power supply #5 |
| 1 | TB6560 3A stepper motor driver |
| 1 | 2GB Micro SD Card + adapter #6 |
#2 from an old computer
#3 remember to power this buck and adjust the potentiometer to get a 5V output, before you connect the Arduino!!!
#4 I use 2 pin tactile switch from an old printer, if you want to use a 4 pin switch, before you solder the wires on it, check the continuity with a multimeter, so that the pins are not connected when the switch is not pressed, one of them will be ground and one to the Arduino inputs.
#5 the stepper works well with a 12V it will work also with 24V, the buck will provide in both cases a 5V to the Arduino, choose a power supply yourself, more info below.
#6 The size of the text files and images necessary for this pump are about 2MB, so any SD card over this size if fine.


